In October 2019 I have excepted Burdastyle.ru’s Instagram sew-along challenge. I had to complete any Burda pattern dress in 4 weeks, posting my progress and the final result.
Materials
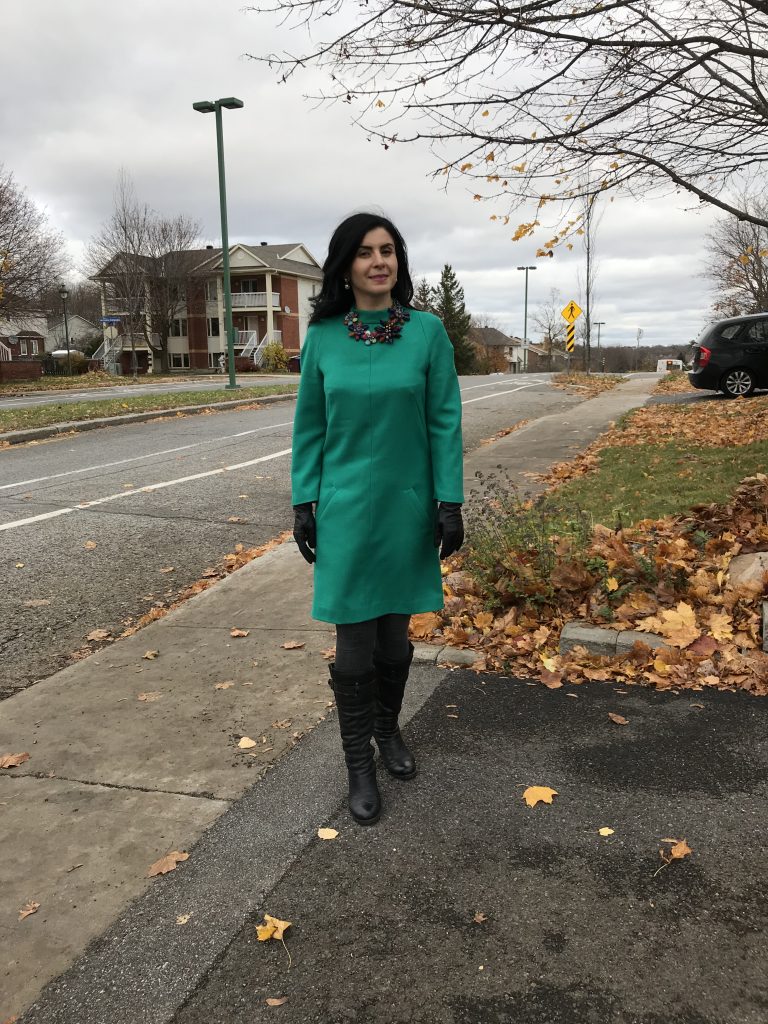
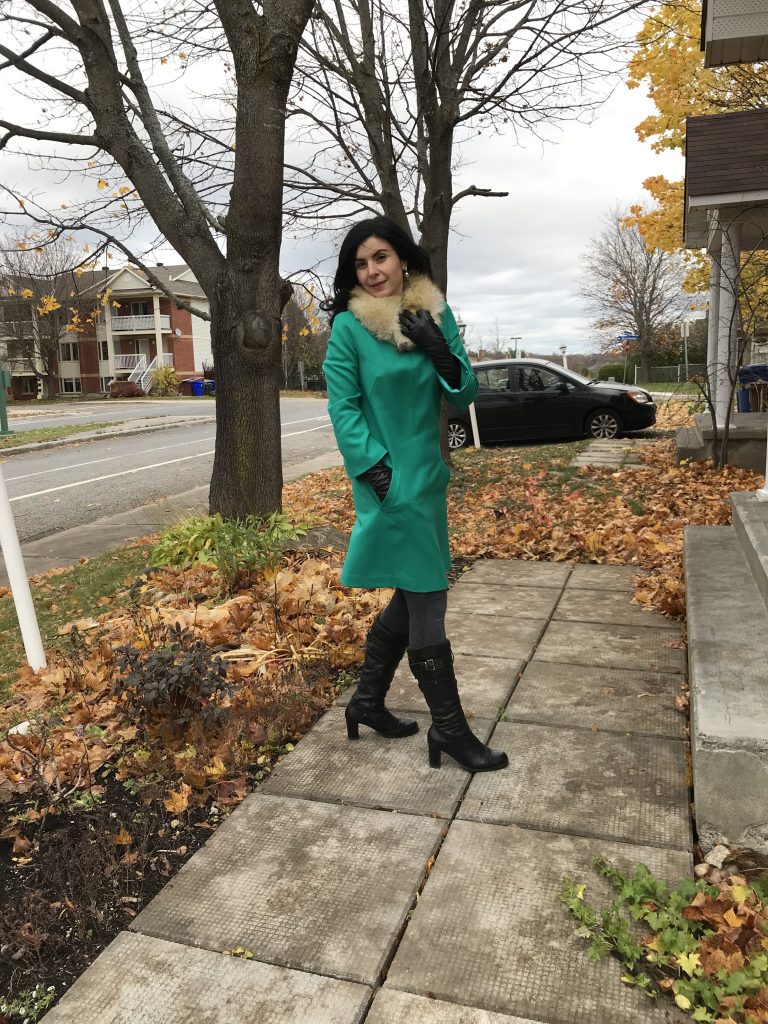
My better half was asking for a warm dress and she pulled out emerald wool serge I bought some time ago at Value Village. I had a matching invisible zipper in the stash. It was also an excellent opportunity to use the vintage fur collar that came from Mrs. M.’s mother’s coat.


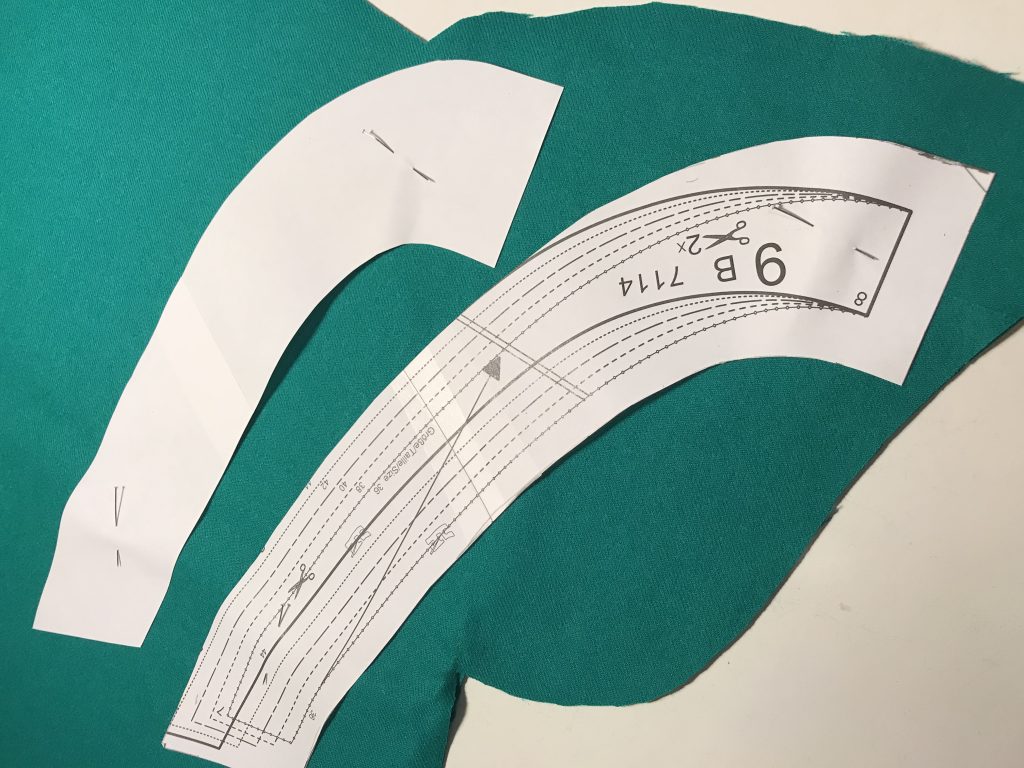

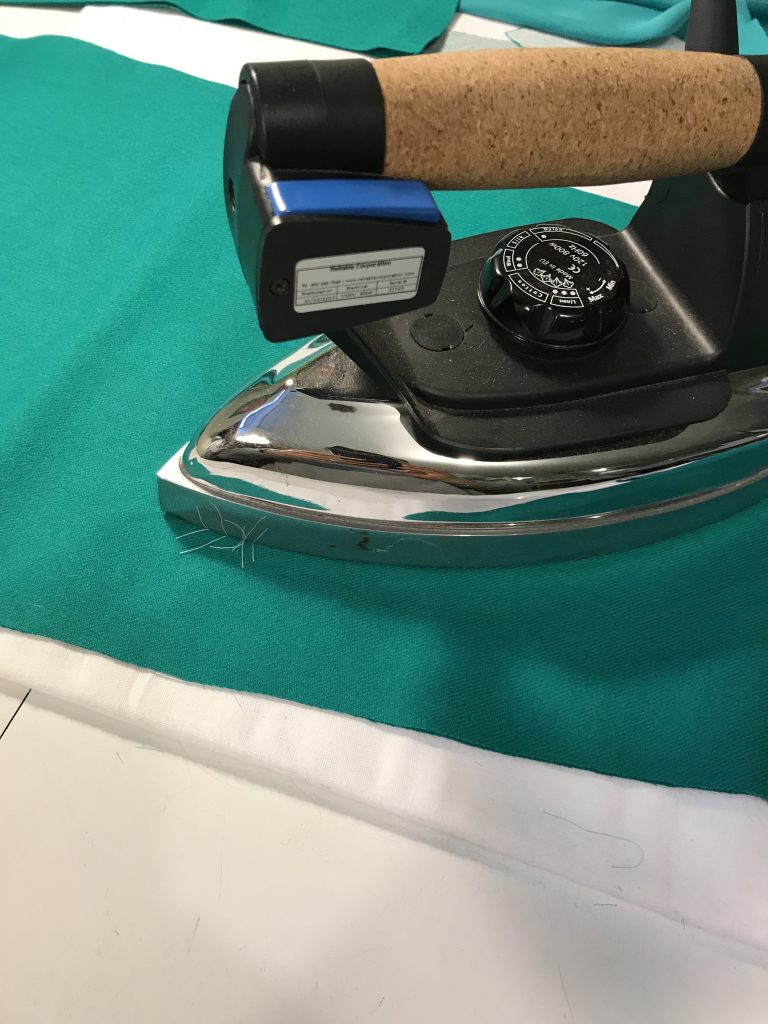
I chose Burda 7114 pattern, cut the fabric and realized that adding the lining to the dress will help it not cling to the body. So, a quick and successful trip to Fabricville later, I had a polyester satin that matched the wool fabric perfectly. This lining fabric is very fluid and difficult to work with. It is a dream to the touch and it was worth the effort!
Process
This dress pattern is very simple. There is a dart in the front and a dart in the back, one-piece sleeve and a simple stand-up collar. Invisible zipper is in the center back, which I had to put in on a domestic sewing machine, because I still don’t have an appropriate invisible zipper foot for my industrial one.


Veering slightly from the instructions, I added a little backing to the end of the bust dart to help support it and equalize the thickness of fabric in this spot. As well, instructions don’t accommodate lining, so I had to improvise with the sequence of putting the dress together.
I enjoyed sewing the raglan sleeve (my first). It is very unnerving to set in the sleeve before sewing the shoulder seems. But the good news is that this pattern and this type of sleeve don’t have any ease.
Pockets
Ah, pockets… Easy to make, if the lining plays along. I spent the most time sewing these, especially pocket bags, because the lining fabric was going each and every direction. There was a lot of basting to stabilize the seams. The welt is secured at the sides to the front by hand.


Finishing touches
Mrs. M. and I, we have opted to longer sleeves, which did not give me much room for hemming them. I calculated that the shorter lining should hem the sleeves perfectly. This, however, did not happen, so I had to calculate, iron and secure the sleeve hem by hand after I put the lining in.


Understitching collar lining. This is where the dress and the lining are connected.
Learning from the sleeves, I hemmed the bottom of the dress by hand, and then attached the lining to the hem by hand as well. I did not realize that a simple pattern like this will require so much hand sewing! But I am happy to report that it is becoming faster and more accurate!
Final shoot
It was the last day before the deadline. The dress has already been worn for a day. After work, we just stepped outside in the brisk wind and took a fast couple of shots.